 When it comes to testing slow network conditions, we already covered Network Link Conditioner. But what’s that you say? You’re wondering if there’s a more robust and extensive tool for network testing and debugging? Well I’m glad you finally asked, because as it turns out, there is, and his name is Charles. Charles Proxy is a cross-platform proxy application that can be used to monitor and manipulate traffic. Go download and install the trial so we can get started.

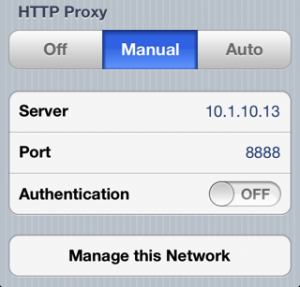
After starting up Charles you’ll need to configure your device to route its traffic through your computer (unless you’re using the sim, in which case you can skip this part). With your computer and iOS device on the same network, go to your iOS device Settings, then go to Wi-Fi and tap on the blue circle with a white > in it to the right of your network. Scroll to the bottom and under HTTP Proxy, tap Manual. For the Server, enter your computer’s IP address and for the port enter 8888. Close Settings and now your device’s traffic should be going through Charles.
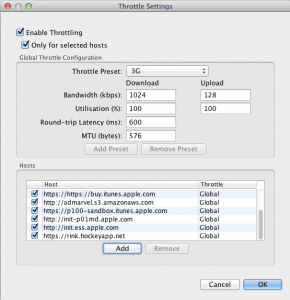
 As previously discussed, Network Link Conditioner lacks the ability to specify which traffic you want to throttle; it’s an all or nothing deal. So first, let’s look at Charles’ throttling feature. Go up to the Proxy menu and select Throttle Settings. Check “Enable Throttling” and “Only for selected hosts”. The throttle settings aren’t much different than NLC, but the “Only for selected hosts” option is something new to us. Any hosts added to the list at the bottom will be throttled according to your settings and all other traffic will go through the proxy unthrottled. This makes testing poor network conditions much more tolerable as you can now slow down your app’s traffic while still listening to your Dubstep Nickelback playlist on Pandora uninterrupted. So add whatever hosts you want to throttle to that list. You can easily toggle throttling on and off by pressing ⌘-T at any time. So now that you’re set to test your app on a slow network, let’s have a look at what else we can do with Charles.
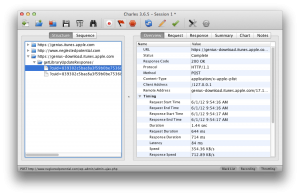
By now you might be seeing some URLs appear in the Structure (left) pane of Charles’ main window. These are all the URLs of requests that have gone through Charles so far this session. If your window is still blank, then you must not have much background traffic going on (or you’re not recording in which case, click that record button up top that looks like… well, a record button). Expanding any one of the URLs will show which files on that site are being hit. As you select them, in the right pane you can see more information like the request to the server and the response that came back. If your application is using SSL for its connections, Charles has you covered there too. You’ll just need to go install Charles’ SSL certificates for your computer and for your iPhone (iOS 4 instructions also work on iOS 5 & 6).
 Once you have the correct certificates installed, you’ll need to explicitly add all hosts that you want to enable SSL proxying for. While you can just add a wildcard to enable SSL proxying for all hosts, there are a number of websites that won’t play nicely with the type of man-in-the-middle attack Charles uses to make SSL proxying possible. Instead it’s recommended that you explicitly add hosts that you’re actually interested in looking at. You can manually add these hosts under Proxy > Proxy Settings > SSL, or if the host you want to proxy already appears in your list of traffic for this session, you can simply right-click on the host and click SSL Proxying. Now any SSL requests made to that host should show up, and the contents of the request and the response should be visible.
The last feature of Charles that I want to touch on right now is the ability to map to local files. Normally your application will make a request and the server will send it a response. Often times for testing, it’s extremely useful to be able to manipulate the server’s response, especially in apps that rely heavily on data from a server. For example, you might want to verify that your application can handle invalid JSON (I’ve previously run into a 3rd-party JSON parser that crashed when it got invalid JSON), but in testing the server might always give you a valid response. Usually to test this I’ll start by having my application make a normal request and receive a normal response. Then in the Structure pane of Charles, find that request, right-click on it and select Save Response. After saving the server’s response locally, you can edit it to your heart’s content. Once you’ve made whatever edits you want, back in Charles right-click on the request again and now select “Map Local…”. In this dialog you can set the local path for the file that you would like Charles to use (the one you just saved and edited) in place of the server’s response. Now the next time your application makes this same request, Charles will hand it your local file instead. You can use this feature to test for things like making sure your app handles long strings of text, large numbers, or blank values. You know, all those scenarios developers say won’t happen, but they always do. You can manage all the requests you have mapped locally under Tools > Map Local…
So there you have it kids. Charles Proxy is a powerful tool for testing and debugging your applications and their traffic. Hopefully this has helped you get started. The Charles Proxy website also has excellent documentation if you find yourself stuck on something or want to learn more about its other features.